Incidents
Digital Incident Report Form
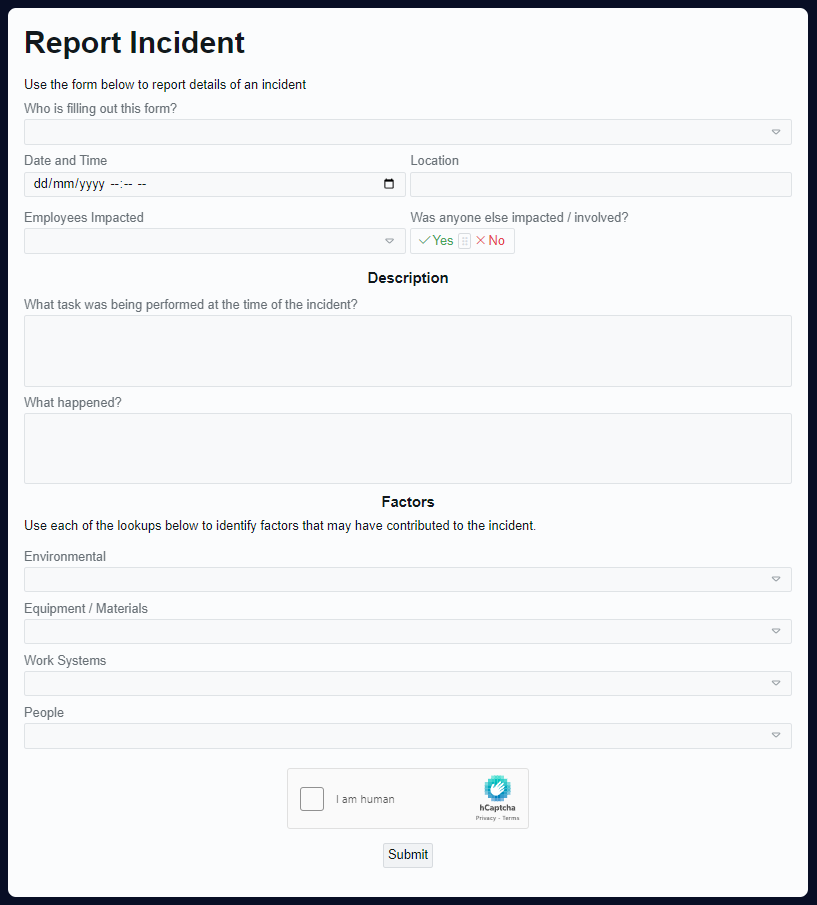
Incident Reports can now be collected digitally, by sending users the URL to our Digital Incident Report form. User responses are then recorded in the Rapid database and can be acted upon by the WHS team. Rapid Standard comes packaged with the following Adaptive form prepared.
To access the Incident Report form:
-
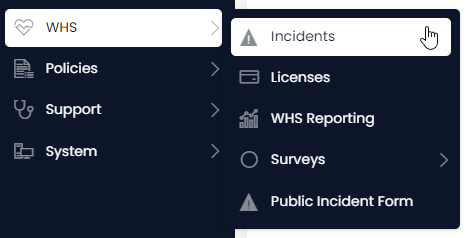
Press WHS in the Sidebar
-
Select Public Incident Form

In a new browser tab, the incident form will open.
You can copy the URL from your browser window if the form needs to be accessed elsewhere (e.g. sending the link via email). Note that this form will create an item in the Rapid database, and that the form contains the names of your employees.
Incidents Table
Incidents entered into the digital Incident Report form are converted into database items, that can then be acted upon, edited, annotated, and have corrective actions applied. New incidents are added to the Incidents table in Rapid Standard.
Accessing the Incidents Table
To access the Incidents table:
-
Press WHS in the Sidebar
-
Select Incidents
Creating a New Incident
A new incident will be created when the Public Incident Form is completed and submitted. Alternatively, new Incidents can be recorded just like any other item.
To create an new Incident report:
- Navigate to the Incidents data table (this process is outlined above)
- Press the New Incident button in the table's Command Bar

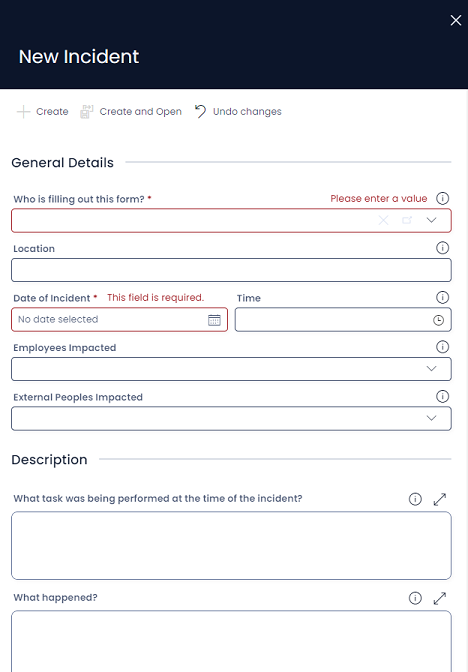
- The New Incident create screen will open in a side panel
- Enter the details of the Incident
- Press + Create or Create and Open at the top of the side panel
Viewing Incidents
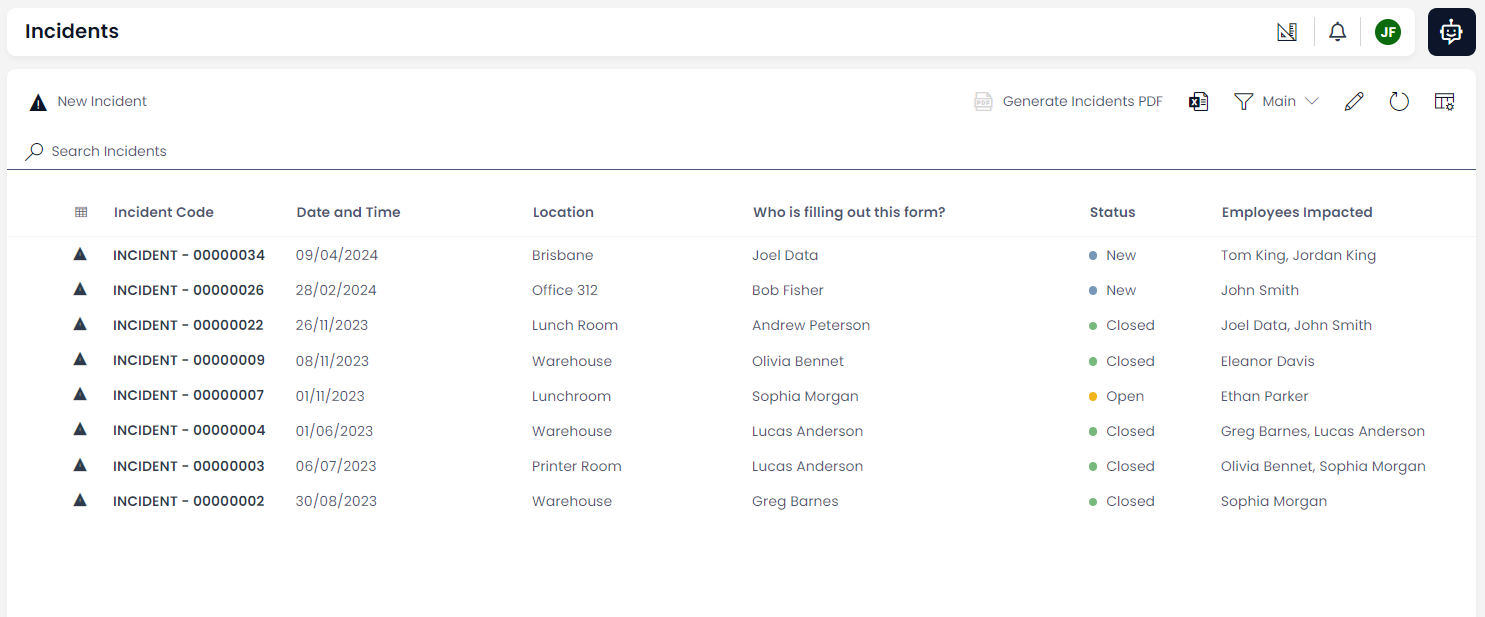
By default, the Incidents table contains the following columns for displaying incident items:
- Incident Code (the title field)
- Date and Time
- Location
- Who is filling out this form?
- Status
- Employees Impacted
Incident Table Views
There are two views created for the Incidents table:
| View | Description |
|---|---|
| All | This displays all of the incident reports except for incident reports that have had their Status set to Archived. |
| Archived | This displays all of the archived incident reports. |
Accessing Incident Reports
You can access, view, or edit individual incident items by opening them from the Incidents table. When an Incident Report is opened, the page is structured as illustrated below:
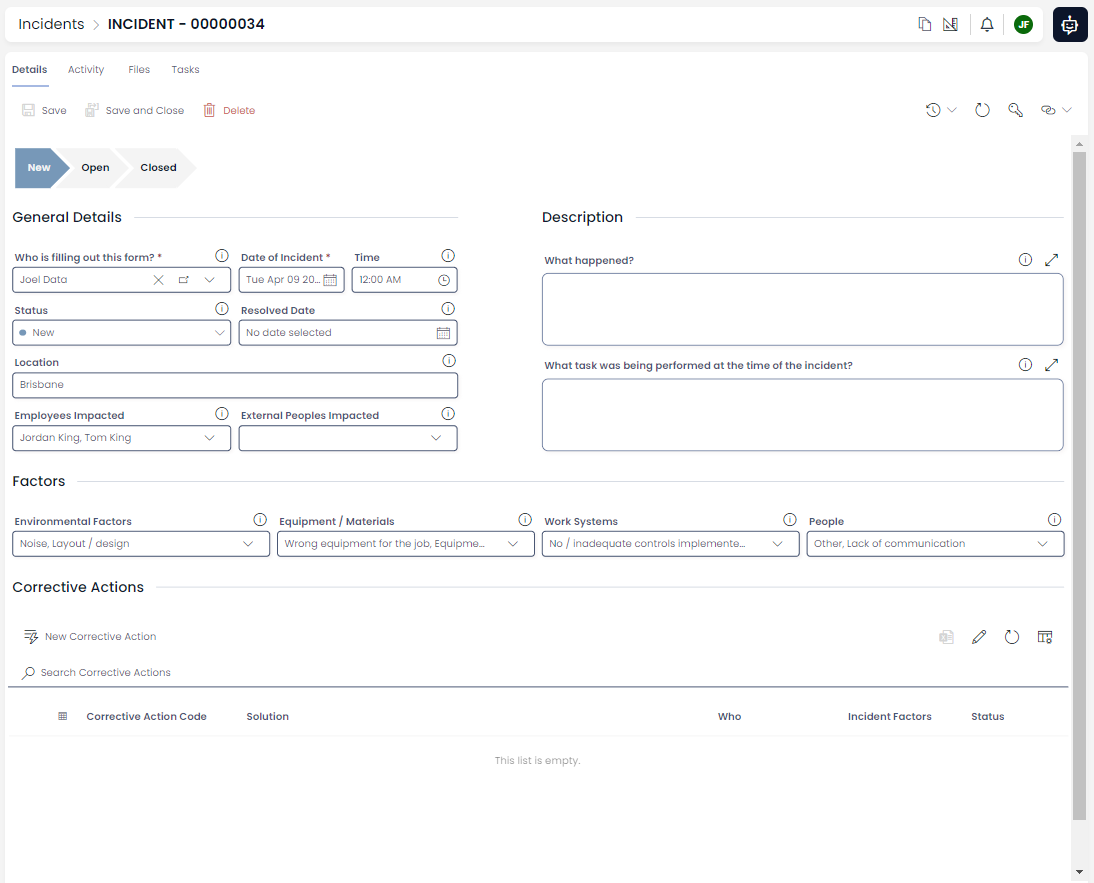
There are four main sections of an Incident Report details page:
| Section | Purpose |
|---|---|
| Incident Pipeline | This Pipeline component illustrates whether an incident is "New", "Open" or "Closed". |
| General Details | For recording crucial data such as who the incident affected, where it happened, and when it happened. |
| Description | For recording what happened and what task was being performed when the incident occurred. |
| Factors | For recording the Environmental Factors, Equipment/Materials, Work systems, or People that caused the incident. |
| Corrective Actions | This is another Data table where the Corrective Actions implemented by the WHS team can be recorded. |
Incident Report Pipeline
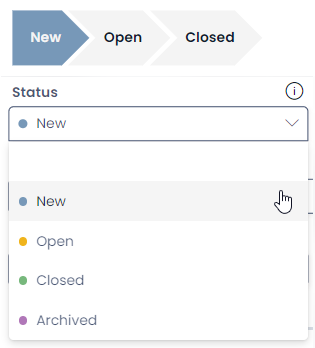
The Incident Pipeline is a Pipeline component that visually communicates the status of the Incident Report.
To change the Status of an incident report:
- Click a stage of the Incident Report Pipeline
- Press Save
Alternatively:
- Click the Status choice field. A drop-down menu will appear.
- Select a status from the choices.
- Press Save
The "Archived" status has been disabled on the incident report Pipeline. If this status is selected, every stage of the Pipeline will turn grey.
Incident Status
The following table describes each incident status, and its meaning:
| Status | Meaning |
|---|---|
| New | The incident report has been created, but no action has been taken to resolve or correct it. |
| Open | The incident report is under review. |
| Closed | The incident report is closed. No further actions will be taken regarding the incident report. |
| Archived | Useful for old incident reports that the user no longer wishes to see in the Incidents table's "All" view. |
It is always preferable to "Archive" an incident report, rather than deleting it. This is because they are legal documents which may need to be produced in the case of worker's compensation or lawsuits. By "Archiving" an old incident report, it is still accessible but will not appear in the Data Table's "All" view.
Incident Process
-
When a new incident is created, it will trigger a Workflow Process that will automatically assign the incident as a task to the "WHS Team". The task item will then appear as a notification for all members of this team.
-
The incident task will be assigned the title:
NEW INCIDENT - and Validate INCIDENT - 00000000. In the title,00000000will be replaced with the incident's ID number.
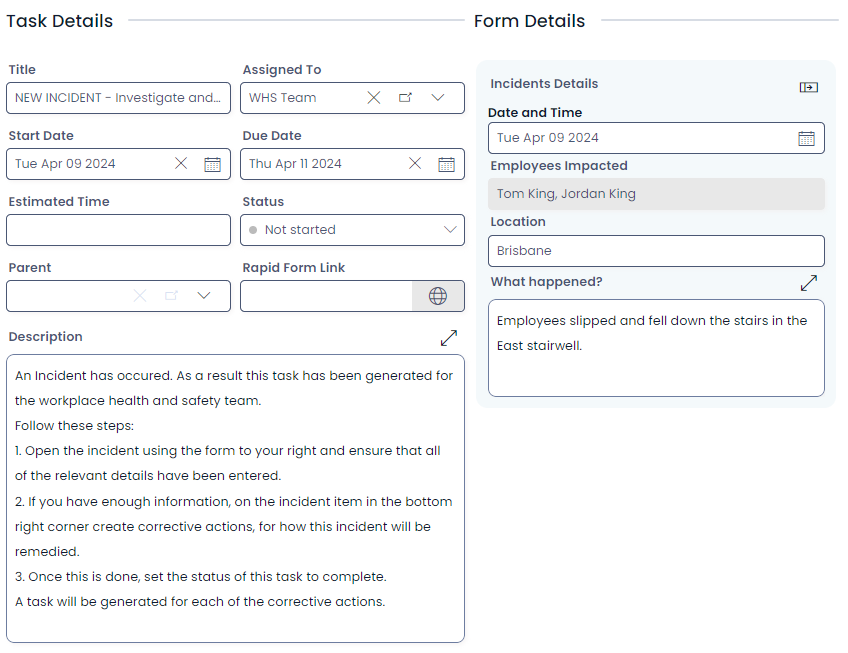
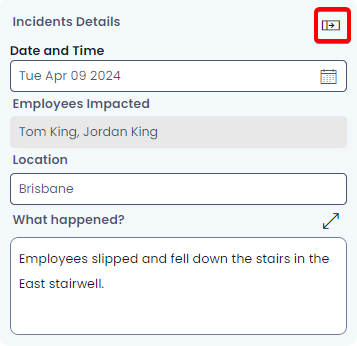
- The WHS can navigate to the incident item using the "go to incident" button on the Embedded Form.
-
The WHS team can then create Corrective Actions, which will also generate tasks for users who are required to perform a corrective action to fix the issue.
-
Once the NEW INCIDENT task is resolved, the system will automatically change the incident item's Status to Open.